For the first time ever, I think, none of my finals are actually "finished" this semester. They were technically completed in terms of the actual course requirements, but I still have work to do on both of them.
First I shall discuss the more finished of the two.
I present to you: Feles Velos, a.k.a. Felix!!!

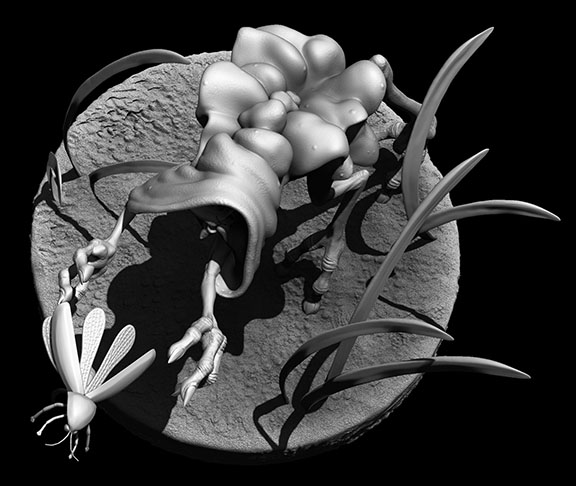
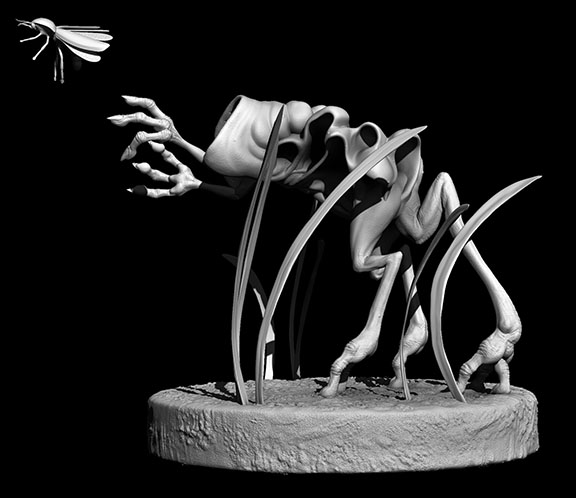
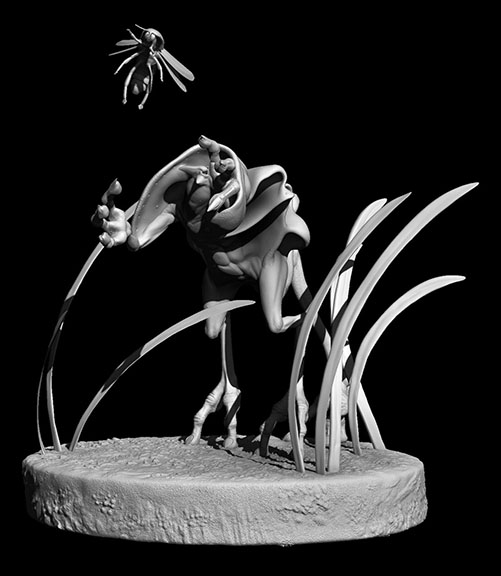
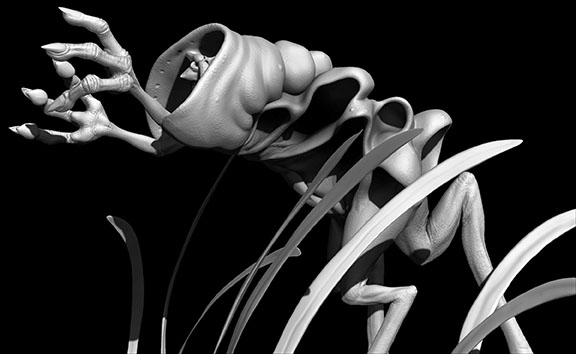
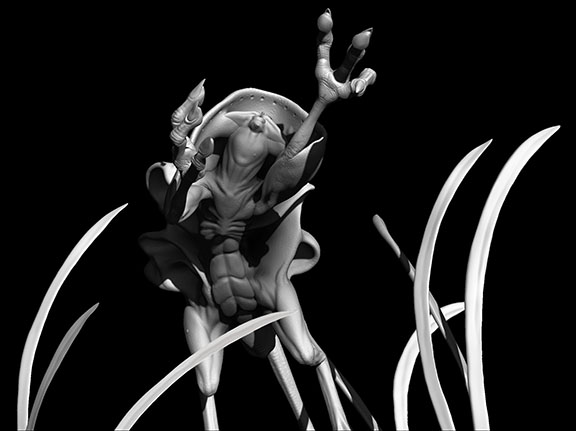
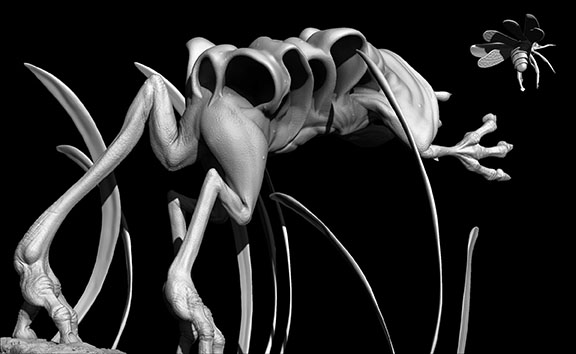

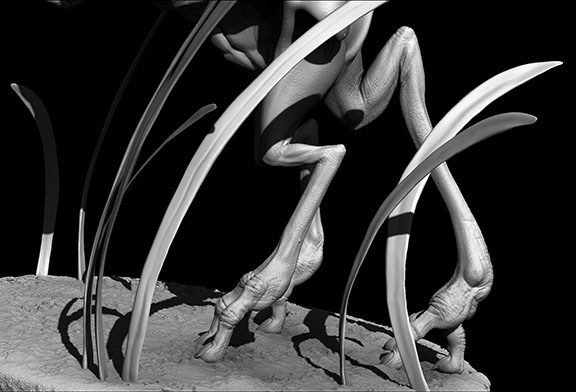

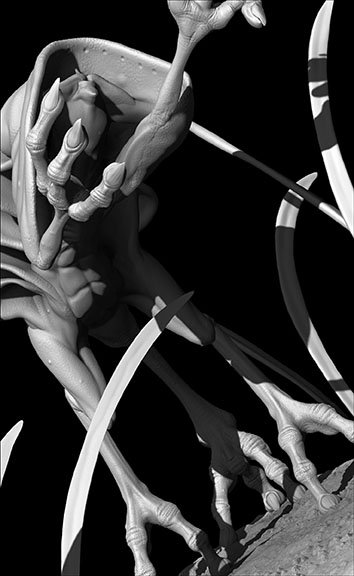
I decided to put him on a dirt and grass base trying to capture a firefly. Poor Felix! All he wants to do is hug the little creature, but it's flying just beyond reach...
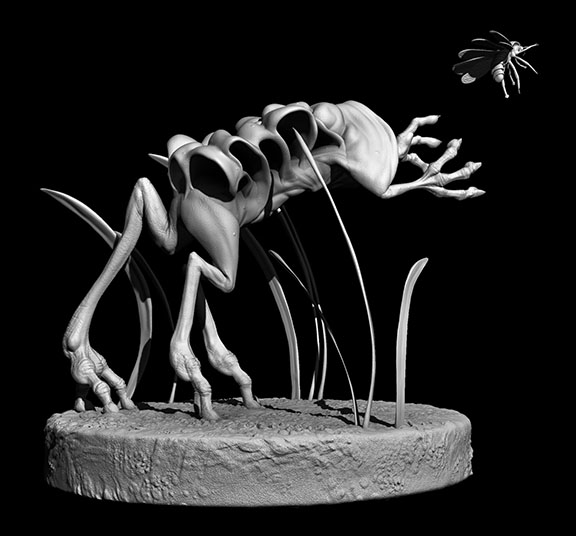
On a more technical note, there are multiple reasons that I consider him unfinished, despite how awesome I think he looks already. Reason number one: I want to texture him. I had this idea to create a hooded creature with bioluminescence, and Felix, here, is the result, but you'll never know that he has bioluminescence if I don't texture him. (Plus, now that I know all of the cool texture elements that I can create in Modo I'd like to texture something organic there - all of my thesis objects to texture are hard-surface.) Reason number two: His face isn't very detailed. You'll notice that in all of the images I rendered out of Felix and presented here, his face is featured only once. That's because his face really only looks good at one angle at the moment. This is mostly due to the fact that I caved in his eyeballs to create shadows for the iris and pupil areas. It's a sculpture technique that I've used before, and it generally works quite well, but, since Felix is a nocturnal creature, I wanted to give him gigantic pupils, and, thus, caving in his pupils essentially destroyed the roundness of his eyeballs. This threw off the whole face. From any angle other than the front his face just looks lopsided (which isn't helped by the fact that I sculpted him with a kind of lopsided smile). I will be able to fix this problem when I texture him, because when I do that I'm going to give him full eyeballs, with secondary geometry inside the clear outer ball shape to represent the iris and pupil (McKay showed us how to construct and texture an eye properly that way in class, and it looked so great that I just have to try it). Once there's an actual spherical shape to sculpt the eyelids and cheeks around, his facial shape should improve drastically. Reason number three: Felix's hood and the folds along his back are still dynamesh geometry. Leaving them that way just feels sloppy to me. I think dynamesh is fine for a digital sketch and sculpting odd forms that one plans to retopologize later (such as the shapes down Felix's back), but it doesn't seem appropriate to to put a full-blown, detailed creature model containing dynameshed pieces into one's animation model portfolio. Thus, I need to retopologize the hood and back ruffles and project their detail onto the new geometry. I'd actually really like to get all of Felix's fleshy parts as one piece, but I'm not entirely sure that I'll be able to do that without losing a lot of my detail work given the way that I constructed him. I have a few tricks up my sleeve that I plan on trying, though. I guess we'll see if any of them work...
Moving on, I also got some new work in on my Juggler this week, but she is still by no means finished.
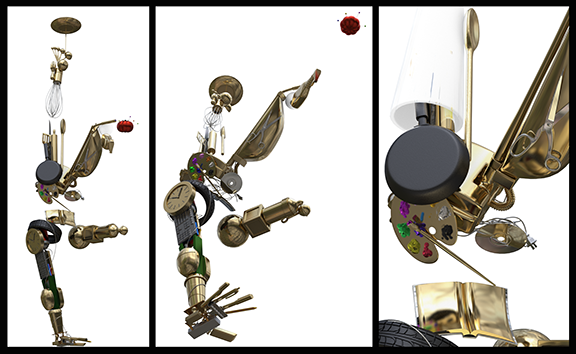


I finished my brushed/etched (I'm not sure, technically, what to call it) silver plug texture. Here's a close-up since the tonal shifts aren't very visible in the render of the entire hand above:

You can see the streaking of the color a bit better in this one. What you can't see, however, is the anisotropy that I put on it; that really only becomes apparent in moving images where the camera is panning across the surface. I'll be sure to put a shot like that in my video render for my demo reel when the model is finished.
The UVing of the plug and outlet was a very long process. It doesn't really look all that complicated at first glance, but it actually has quite a few plane breaks that all had to be cut apart and sewn back together to get them to unfold properly. I think I spent 1 1/2 class sessions of nearly three hours apiece UVing just that plug and outlet. That wouldn't have seemed that long to me when I first started out on this project because I was much slower at UVing just a couple of months ago: 4.5 hours per piece was probably near average for me, but I've gotten a lot more practice in and am generally much faster at UVing now, so 4.5 hours on one piece was torturous. Once I finished that the brushed silver texture that I created (with McKay's help) worked like a charm. I had to lay out the UVed pieces by hand so that the grain flowed consistently in the right direction across the piece, but once I got that set up the rest was simple. I gave it a very slight bump to get some tonal variations in the surface texture, then I applied the anisotropy map (that I also created) to it so that it would catch the light the way that I want it to when the camera pans around it.
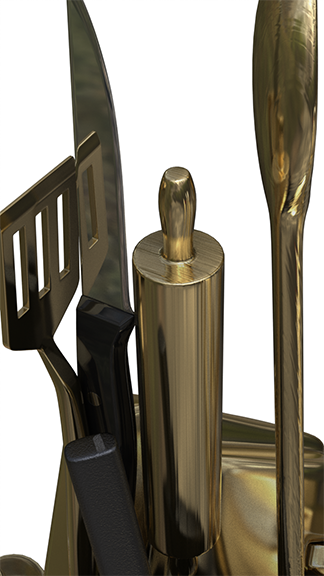
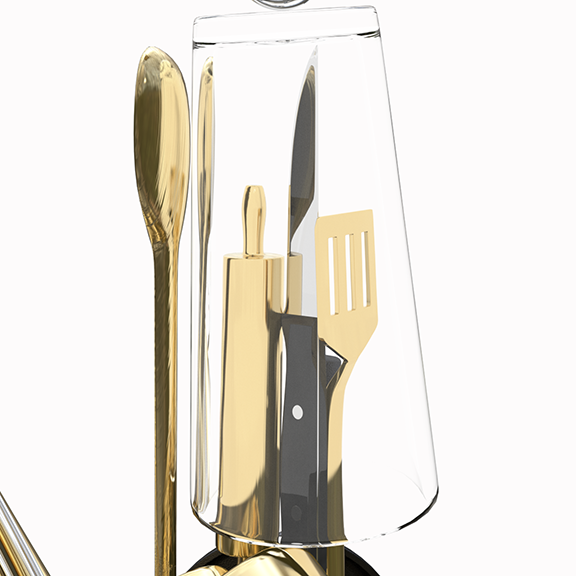
I then textured a number of other items, including the knife (above), which I think may currently have a bit too high of a gloss for the black titanium that I was trying to get the handle to look like, and the pin cushion, which still needs a normal map applied to it. I won't be able to put that on, however, until I sculpt on the pin cushion in ZBrush first. Nonetheless, I'm happy with how the texture of the pin cushion came out. I don't have any big plans to change it much once I get the normal map on (except for giving it a grunge layer of some sort, which the whole statue is sorely in need of - it's currently much too perfect). I added a Modo woodgrain texture layer as a bump map to the rolling pin and the wooden spoon models next to the knife. I had planned to create my own woodgrain bump for them in Photoshop, but the Modo procedural actually seems to work pretty well. I had to reposition the texture locators to the base of each model to eliminate an odd starburst pattern that occurred around where the locators were originally placed, but that was quite easy to do. After that, they looked pretty good. I'm not sure that I'm entirely happy with the spoon - the grain almost looks blurry to me in the render that I did - but it'll suffice for now.
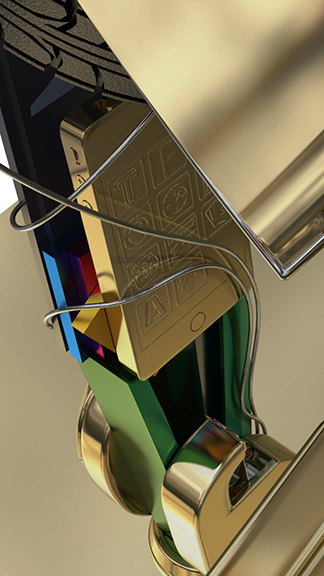
Another thing that I accomplished this week was the creation of a bump map for my keyboard:
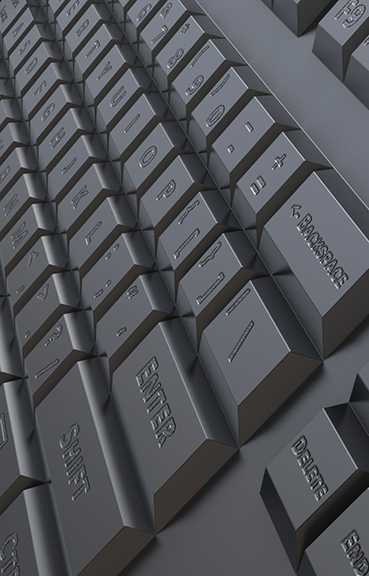
I decided to texture the keyboard as if the key labels were etched into the metal. I typed everything out onto the UV snapshot in Photoshop, then turned the typing into a mask layer with noise behind it to give the letters the uneven surface that comes from etching metal. I'm debating about saving a version of my letter map as an all-black PNG with transparency where the letters and symbols are to use as a layer mask in Modo instead though. I would apply this mask over a new material that would be a copy of the steel material that I created for the keyboard with a very fine noise bump applied to it. I'm hoping that that might fix the fact that the noise bump currently in the letters is a little too coarse for my taste. I tried making the noise finer in Photoshop, but it's not so much a problem with the noise as it is a problem with the pixelation of the image map. The map is already huge, so I'm hesitant to try to increase the map size to make the bump grain finer, but determining the size of the bump and just masking it off in Modo might work better...
After the keyboard I moved on to my paint palette and brush. I sculpted them in ZBrush, used Maya's transfer maps to bake some normal maps of their details, fixed the normal map of the palette in Photoshop because the envelope that Maya created the normals from was too small and cut off the tops of most of the paint globs, then used the normal maps as guides for where to put color on the specular color map that I created and where to reveal that color on the layer mask map. The whole process worked pretty well. I blurred the edges of the layer mask map a bit too much, so the transition from color to ordinary bronze isn't quite right, but I should be able to fix that pretty easily by taking it back into Photoshop. I also learned something new: gamma correction. My blue "paint" was purple in the first renders that I did. It was then kindly pointed out to me that I needed to gamma correct my color map to .455, and viola!
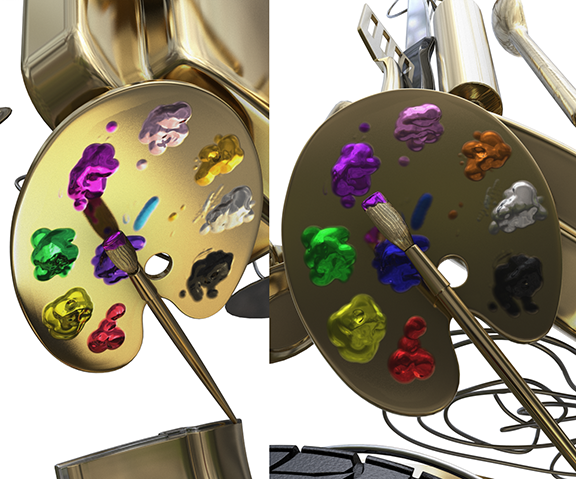
The blue is blue, the orange is orange, the purple isn't pink... it's amazing!
The last couple of things that I did in my Modo class on Friday were to create a label for my spray bottle and get some help from McKay fixing the glass in my scene. You can see in some of the above images where the vase is present that everything inside of the vase is completely blown out. The problem there was that I assumed that glass had a high spec, but it turns out that it can actually have quite a low one. I think McKay turned it down to something like 3% for me, and immediately you could see into the vase - finally! The problem then became (which has been the same problem I've encountered when I've tried to fix this issue myself) that the hidden environment was visible through the vase. I thought that this was a problem with reflections, and I didn't want to turn off reflections on glass, but it turns out that it was actually a problem with the refractions. McKay helped me switch the refractions off on the reflecting environment and on in the white background environment, and this was the result:
Before:
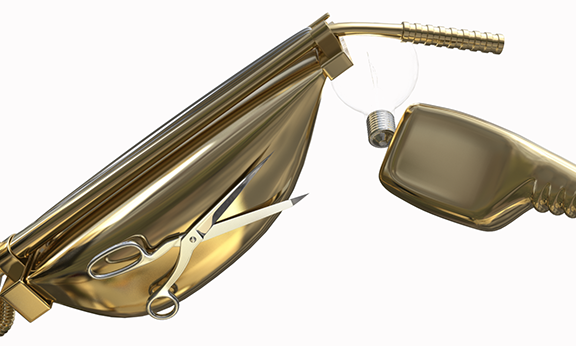
After:

It's beautiful! It's just what I wanted it to look like. And now you can also see the modeling that I did inside of the light bulb. I created two layers of glass to hold the filament wires, but you could never see them in most of the earlier renders that I did. Now they're plainly visible, and it makes me quite happy!
And that's it. That was the extent of my finals for the semester. Now I have about a month long break, during which I shall continue to work on my Juggler so that, hopefully, she is finished before the summer semester begins. I actually hope to get much more than just her done, but we'll see how it goes - I don't want to skimp on the details now that I'm finally getting to them. And, of course, I will continue to work on Felix, but he may have to wait until I've taken a more formidable chunk out of my thesis. After all, I've only got about six months more to finish it in...